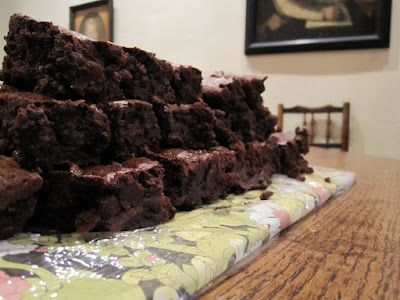
And the second part of B.'s birthday baking: boozy chocolate cherry brownies. This recipe popped up on 101 Cookbooks back in the spring and making it became a matter of not if but when. And while I think they would make a great dead-of-winter dessert, these port-soaked-cherry-studded brownies made a nice addition to our themed menu.
I made a few adjustments, mostly cutting back on both the sugar and chocolate. I know, cut back on the chocolate? Was I not myself? But these are more than rich enough even without the extra cup of chocolate chips in the batter. I also chopped the cherries roughly to distribute them more evenly - both my hands and my kitchen smelled strongly of port for an hour afterwards. Yum.
As the recipe warns, these are messy: chill them first, rinse your knife in warm water between each cut, and you'll still end up prying squidgy, sticky squares out of the pan. But no one will mind uneven edges or fudgy fingers, because these are deliciously intense. Intensely delicious. Yes.
Chocolate Cherry Brownies
adapted from 101 Cookbooks
2 c. (10.5 oz.) dried cherries (*I used tart rather than sweet)
scant 1 c. port wine
1/2 c. all-purpose flour
1/3 c. unsweetened cocoa powder
1/2 tsp. salt
2 tsp. baking powder
10.5 oz. dark chocolate
5 1/2 tbsp. unsalted butter
1 1/4 c. brown sugar
4 eggs
scant 1/2 c. sour cream
1. A day or two before you want to bake the brownies, combine the cherries and port in a med. bowl or container; cover and let sit, stirring every 12 hours, until almost all of the port has been absorbed. (*If you'd like, you can then chop the cherries before adding them to the batter.)
2. Preheat oven to 325F. Lightly butter and line a 9x13" pan with parchment paper in both directions - you'll need this sling to lift out the brownies later.
3. Sift together flour, cocoa, salt, and baking powder; set aside.
4. Heat chocolate, butter, and sugar in double boiler until chocolate has just melted. Transfer to bowl of electric mixer and allow to cool enough so that it won't cook the eggs. (*I turned the mixer on "stir" and let it go for a few minutes to let out some of the heat.)
5. Mixing on slow, add the eggs one at a time, letting the first get incorporated before adding the next. Scrape down bowl as necessary.
6. Add flour mixture and stir by hand until combined, then add sour cream and cherries, stirring again until just combined.
7. Spoon into the pan and bake for about 1 hour, or until just set. Allow to cool completely in pan. Chilling the brownies will help to slice them; rinsing off your knife between each cut helps too. Bring to room temp. for serving.
8.28.2010
8.22.2010
birthday surprise i: tiramisu cake.
Last week, B. had a birthday. And so we celebrated. The actual birth-day included mid-morning kir royales at Parc, sipped at a sidewalk table, followed later by dinner at Stella. Pistachio and red onion pizza; black truffle and egg pizza; margherita pizza; broccolini and garlic pizza. All-around pizza goodness, capped off with ice cream at the Franklin Fountain.
Impossible to top, right? Wrong. Even more yumminess ensued the next day. Surprise yumminess!
We plotted a boozy birthday party complete with multiple kinds of cocktails and alcohol-infused desserts. C. and I baked, M. and T. went on a hunt for cheese so that we didn't all go into sugar shock, and M. tended bar despite her jet-lag. We schemed, we decorated, we waited eagerly for the surprise moment, and then we celebrated. The final menu:
Before the party, though, there was baking. Much baking. Wish-I-had-two-ovens-or-at-least-more-counterspace-so-that-I'm-not-balancing-bowls-on-the-edge-of-the-sink baking.
I love to cook and bake for people - especially to bake. Being able to present someone with a pretty treat lets me say, "Hey, I care about you." It's not the only way to do so, of course, and yes, I realize that I'll have to seriously revise this strategy before I someday have children and inadvertently turn them into little butterballs of baked-good love, but it works for me.
First up? Tiramisu cake. Tiramisu was a no-brainer for this boozy bash, but we needed a cake for candles! Enter this recipe from smittenkitchen. The final product was delicious. Getting there was ... tricky. This is something of a fiddly recipe, and it wasn't helped by the significant heat/humidity going on that day. The frosting was particularly troublesome; I ended up whipping an extra 3/4 c. of heavy cream and folding it in so that I would have enough to cover the entire cake, and it was decidedly lumpy-looking. Still, though, the cake turned out well, and I would make this recipe again, perhaps with a bit more experimentation and a bit less summer ickiness.
Tiramisu Cake
from smittenkitchen
Cake layers:
2 c. cake flour (*hint: you can substitute for 1 c. of cake flour with 7/8 c. all-purpose flour and 1/8 c. cornstarch; easier than keeping cake flour around)
2 tsp. baking powder
1/8 tsp. baking soda
1/4 tsp. salt
10 tbsp. butter, at room temp.
1 c. sugar
3 eggs
1 egg yolk
1 1/2 tsp. vanilla extract
3/4 c. buttermilk
Espresso extract:
2 tbsp. instant espresso powder
2 tbsp. boiling water
Espresso syrup:
1/2 c. water
1/3 c. sugar
1 tbsp. amaretto, Kahlua, or brandy (*I used rum)
Filling and frosting:
8 oz. mascarpone
1/2 c. confectioners' sugar, sifted
1 1/2 tsp. vanilla extract
1 tbsp. amaretto, Kahlua, or brandy (*again, I used rum)
1 c. heavy cream
bittersweet or semi-sweet chocolate (*finely chopped, chips, or grated from a large bar, as I did)
Make the cake:
1. Preheat oven to 350F. Butter and lightly flour two 9" cake pans, then line bottoms with parchment paper. Put the pans on a baking sheet.
2. Combine dry ingredients (except sugar) in a bowl. In a stand mixer, beat butter on med. speed until soft and creamy. Add sugar and beat for another 3 mins. Add eggs one by one and then yolk, beating for 1 min. after each one. Beat in vanilla.
3. Reduce mixer speed to low and add dry ingredients, alternating with buttermilk - add dry ingredients in 3 parts and buttermilk in 2, beginning and ending with dry ingredients. Scrape down the sides of the bowl as needed and mix only until all ingredients disappear into the batter.
4. Divide batter evenly between two pans and smooth down tops with spatula. Bake for 28-30 mins., rotating the pans halfway through. Cakes are done when golden and springy and a knife inserted into the center comes out clean. Transfer cakes to a rack and cool for 5 mins., then run a knife around the sides, invert them, remove paper liners, turn them back onto rack and cool right-side up.
Make extract:
1. Combine boiling water with espresso powder in small bowl; stir and set aside.
Make syrup:
1. Stir water and sugar together in small saucepan until barely boiling; pour into heatproof bowl, stir in liquor of choice plus 1 tbsp. espresso extract, then set aside.
Make filling/frosting:
1. Whisk mascarpone, sugar, vanilla, and liquor in med. bowl until combined. Set aside.
2. In stand mixer, whip heavy cream until it holds firm peaks. With rubber spatula, stir 1/4 whipped cream into mascarpone mixture; fold in the rest lightly.
Assemble cake:
1. Place one layer right-side-up on a cardboard round or cake stand (protected with strips of parchment paper slid under the edge of the cake so that you won't get frosting everywhere). Using pastry brush or small spoon, soak layer evenly with about 1/3 of espresso syrup. (*I found that the cake soaked up the syrup really, really quickly. Next time, I'm using a pastry brush instead of a spoon. Once I buy a pastry brush.) Smooth some of the mascarpone over the layer - about 1 1/4 c., or enough to cover. Sprinkle/grate your chocolate of choice on top.
2. Invert the second cake layer on a plate/counter and soak the bottom with half the remaining syrup, then turn it over and position it, syrup side down, over the filling. Soak the top with the rest of the syrup.
3. For the frosting, whisk 1 to 1 1/2 tbsp. remaining espresso extract into remaining mascarpone filling. (*This is where I ran into trouble: there wasn't nearly enough mascarpone mixture to cover the cake, so I whipped an additional 3/4 c. of cream with a dash of vanilla and a sprinkle of instant espresso tossed in so it wouldn't be too bland and folded it into the mascarpone mixture along with the espresso extract. It did increase the volume of the frosting and certainly tasted good, but the texture was a bit off.) Taste frosting as you go to decide how much espresso flavor you want. If the icing looks a bit too soft to spread, press plastic wrap on top and refrigerate for 15 mins.
4. With metal icing spatula, smooth frosting around sides of cake and over top. Decorate with chocolate-covered espresso beans or cocoa powder.
5. Refrigerate cake for at least 3 hours (or up to 1 day) before serving to let the flavors set.
A word about decorating the cake: Deb at smittenkitchen cut out a wax-paper star stencil and grated dark chocolate over top, which looked great. It inspired me to break out of my usual piping bag routine and try a (slightly more ambitious/compulsive) stencil of my own. I wrote my happy birthday message on a legal pad, using the lines to get the letters even, and then traced on either side of each stroke to create thicker letters. Then I glued each word to wax paper and cut them out for my makeshift stencils, then pressed them lightly onto the cake (wax-paper side down).
Then I microplaned dark chocolate on top:
And, after giving a light puff to the chocolate and thereby scattering it all over my counter and myself, carefully removed them. Cool trick!
Impossible to top, right? Wrong. Even more yumminess ensued the next day. Surprise yumminess!
We plotted a boozy birthday party complete with multiple kinds of cocktails and alcohol-infused desserts. C. and I baked, M. and T. went on a hunt for cheese so that we didn't all go into sugar shock, and M. tended bar despite her jet-lag. We schemed, we decorated, we waited eagerly for the surprise moment, and then we celebrated. The final menu:
DRINKS
Ginger lemonade
M.'s concoction, with fresh mint and honey - yum!
*
Gin & tonic
Made with Fever Tree tonic water; impressive.
*
Old-fashioned
Potent.
*
DESSERTS
Tiramisu cake
See below.
*
Peach and blackberry trifle
Joint desserting effort with C. - wonderful.
*
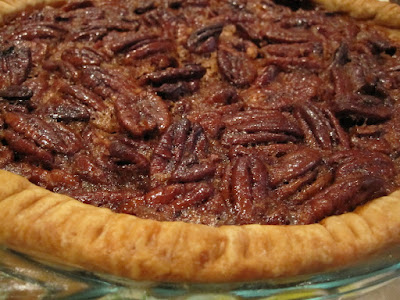
Bourbon pecan pie
C.'s. Oh. My.
*
Chocolate cherry brownies
Details soon.
Before the party, though, there was baking. Much baking. Wish-I-had-two-ovens-or-at-least-more-counterspace-so-that-I'm-not-balancing-bowls-on-the-edge-of-the-sink baking.
I love to cook and bake for people - especially to bake. Being able to present someone with a pretty treat lets me say, "Hey, I care about you." It's not the only way to do so, of course, and yes, I realize that I'll have to seriously revise this strategy before I someday have children and inadvertently turn them into little butterballs of baked-good love, but it works for me.
First up? Tiramisu cake. Tiramisu was a no-brainer for this boozy bash, but we needed a cake for candles! Enter this recipe from smittenkitchen. The final product was delicious. Getting there was ... tricky. This is something of a fiddly recipe, and it wasn't helped by the significant heat/humidity going on that day. The frosting was particularly troublesome; I ended up whipping an extra 3/4 c. of heavy cream and folding it in so that I would have enough to cover the entire cake, and it was decidedly lumpy-looking. Still, though, the cake turned out well, and I would make this recipe again, perhaps with a bit more experimentation and a bit less summer ickiness.
Tiramisu Cake
from smittenkitchen
Cake layers:
2 c. cake flour (*hint: you can substitute for 1 c. of cake flour with 7/8 c. all-purpose flour and 1/8 c. cornstarch; easier than keeping cake flour around)
2 tsp. baking powder
1/8 tsp. baking soda
1/4 tsp. salt
10 tbsp. butter, at room temp.
1 c. sugar
3 eggs
1 egg yolk
1 1/2 tsp. vanilla extract
3/4 c. buttermilk
Espresso extract:
2 tbsp. instant espresso powder
2 tbsp. boiling water
Espresso syrup:
1/2 c. water
1/3 c. sugar
1 tbsp. amaretto, Kahlua, or brandy (*I used rum)
Filling and frosting:
8 oz. mascarpone
1/2 c. confectioners' sugar, sifted
1 1/2 tsp. vanilla extract
1 tbsp. amaretto, Kahlua, or brandy (*again, I used rum)
1 c. heavy cream
bittersweet or semi-sweet chocolate (*finely chopped, chips, or grated from a large bar, as I did)
Make the cake:
1. Preheat oven to 350F. Butter and lightly flour two 9" cake pans, then line bottoms with parchment paper. Put the pans on a baking sheet.
2. Combine dry ingredients (except sugar) in a bowl. In a stand mixer, beat butter on med. speed until soft and creamy. Add sugar and beat for another 3 mins. Add eggs one by one and then yolk, beating for 1 min. after each one. Beat in vanilla.
3. Reduce mixer speed to low and add dry ingredients, alternating with buttermilk - add dry ingredients in 3 parts and buttermilk in 2, beginning and ending with dry ingredients. Scrape down the sides of the bowl as needed and mix only until all ingredients disappear into the batter.
4. Divide batter evenly between two pans and smooth down tops with spatula. Bake for 28-30 mins., rotating the pans halfway through. Cakes are done when golden and springy and a knife inserted into the center comes out clean. Transfer cakes to a rack and cool for 5 mins., then run a knife around the sides, invert them, remove paper liners, turn them back onto rack and cool right-side up.
Make extract:
1. Combine boiling water with espresso powder in small bowl; stir and set aside.
Make syrup:
1. Stir water and sugar together in small saucepan until barely boiling; pour into heatproof bowl, stir in liquor of choice plus 1 tbsp. espresso extract, then set aside.
Make filling/frosting:
1. Whisk mascarpone, sugar, vanilla, and liquor in med. bowl until combined. Set aside.
2. In stand mixer, whip heavy cream until it holds firm peaks. With rubber spatula, stir 1/4 whipped cream into mascarpone mixture; fold in the rest lightly.
Assemble cake:
1. Place one layer right-side-up on a cardboard round or cake stand (protected with strips of parchment paper slid under the edge of the cake so that you won't get frosting everywhere). Using pastry brush or small spoon, soak layer evenly with about 1/3 of espresso syrup. (*I found that the cake soaked up the syrup really, really quickly. Next time, I'm using a pastry brush instead of a spoon. Once I buy a pastry brush.) Smooth some of the mascarpone over the layer - about 1 1/4 c., or enough to cover. Sprinkle/grate your chocolate of choice on top.
2. Invert the second cake layer on a plate/counter and soak the bottom with half the remaining syrup, then turn it over and position it, syrup side down, over the filling. Soak the top with the rest of the syrup.
3. For the frosting, whisk 1 to 1 1/2 tbsp. remaining espresso extract into remaining mascarpone filling. (*This is where I ran into trouble: there wasn't nearly enough mascarpone mixture to cover the cake, so I whipped an additional 3/4 c. of cream with a dash of vanilla and a sprinkle of instant espresso tossed in so it wouldn't be too bland and folded it into the mascarpone mixture along with the espresso extract. It did increase the volume of the frosting and certainly tasted good, but the texture was a bit off.) Taste frosting as you go to decide how much espresso flavor you want. If the icing looks a bit too soft to spread, press plastic wrap on top and refrigerate for 15 mins.
4. With metal icing spatula, smooth frosting around sides of cake and over top. Decorate with chocolate-covered espresso beans or cocoa powder.
5. Refrigerate cake for at least 3 hours (or up to 1 day) before serving to let the flavors set.
A word about decorating the cake: Deb at smittenkitchen cut out a wax-paper star stencil and grated dark chocolate over top, which looked great. It inspired me to break out of my usual piping bag routine and try a (slightly more ambitious/compulsive) stencil of my own. I wrote my happy birthday message on a legal pad, using the lines to get the letters even, and then traced on either side of each stroke to create thicker letters. Then I glued each word to wax paper and cut them out for my makeshift stencils, then pressed them lightly onto the cake (wax-paper side down).
Then I microplaned dark chocolate on top:
And, after giving a light puff to the chocolate and thereby scattering it all over my counter and myself, carefully removed them. Cool trick!
8.11.2010
gazpacho.
Today was another like so many this summer: hot toothpaste, cool shower, general sweaty unpleasantness. For comfort, I like to think about this:
[Wistful sigh.] For now, though, I'll just continue to enjoy all the great summer produce, like the tomatoes which made this possible.
Before today, I'd never actually made gazpacho. But I have a feeling that this will become one of my summer staples from now on. It has two main benefits: one, that it requires a good amount of chopping, which I find soothing; two, that it requires absolutely involvement from the stove or oven. Plus it's tasty! The vinegar gives it a nice bite, while the cucumbers and pepper add depth. There's nothing bland about this gazpacho.
I adapted it a bit from Mark Bittman's How to Cook Everything - added a bit of red onion, left the crusts on my bread, and, more significantly, cut way back on the water. Bittman calls for 5 cups of water; I ended up using 1 1/2 and loving the consistency of my soup. Hmm. The original amount seems like it would produce an incredibly watery soup, but perhaps it just depends on how hefty your tomatoes are once they've been cored and seeded. Or something like that. In any case, you might want to add the water a bit at a time and adjust to your consistency preferences. I also missed the step that told me to peel the tomatoes - oops. But I didn't mind the peels and, while getting rid of them might have meant a slightly more uniform smoothness, even liked the slight texture they gave the soup. I'll probably leave them on in the future, too. You could use any combination of tomatoes; since I made this on a non-farmers'-market day, I just combined a few different kinds (plum, on the vine, a big wonderfully lumpy one) from Sue's, along with some cute yellow grape tomatoes.
Beware that making this could get a bit messy. The directions say to process everything (including the 5 c. water!) all together. I have a 7-cup food processor and could barely manage in two batches; there was a noticeable puddle of pink gazpacho-juice by the time I was through. Because of this, I combined all of the chopped veggies in a large mixing bowl, then added the vinegar and the salt and pepper before processing it in two batches, adding half the water and oil to each. Therefore, the directions below are adjusted accordingly, though if you have a mammoth food processor/blender, congratulations, and feel free to toss in everything in one go.
Basic Gazpacho
adapted from Mark Bittman, How to Cook Everything
approx. 3 lb. ripe tomatoes, cored, [peeled,] seeded, and roughly chopped [*optional]
1 red or yellow bell pepper, stemmed, seeded, and roughly chopped
2 Kirby cucumbers, peeled and roughly chopped
approx. 1/8 red onion, chopped (about 1 - 2 tbsp.)
4 slices stale white bread (about 4 oz.), crusts removed (*I used my favorite sourdough from Metropolitan Bakery and, because I almost never plan enough in advance to have stale bread lying about, simply toasted the slices and let them sit for 15 mins. or so. Leaving the crusts on added nice taste and texture. Dipping slices of the bread in the soup is delicious, also.)
1 c. plus 1 1/2 - 6 c. cold water
1 clove garlic, peeled and chopped
1/4 c. good wine vinegar (*I used red.)
1/2 c. olive oil
salt and pepper to taste
1. Combine the chopped tomatoes, cucumbers, pepper, onion, and garlic in a large bowl. Add salt and pepper to taste, along with vinegar.
2. Soak the bread in 1 c. water for 5 mins.; squeeze out excess water and set aside.
3. Place half the bread in the food processor and process until finely chopped; add half the veggie mixture and 3/4 c. water. Process until smooth; add more water if needed. Then with the motor running, slowly add 1/4 c. olive oil. Pour into separate bowl; repeat with the rest of the veggies, another 3/4 c. water, and another 1/4 c. oil.
4. Refrigerate until ready to serve; the flavor will improve over a few hours. Serve with the same bread you used in the soup, if desired.
8.04.2010
pancake for one.
The other night, in between various travels and utterly empty-pantried, I remembered this recipe from Joy the Baker. Breakfast for dinner? Yes, please!
She calls it the "Single Lady Pancake." It's easy to whip up and feels satisfyingly decadent. And yes, it might prompt you to bop around the kitchen singing Beyonce while making it.
I made a few changes to this - upped the oats (yum) and scaled back on the sugar (brown instead of white). Still, this is a whole lotta pancake. The picture below is a full-sized dinner plate:
Indeed. And while I've never - ever - been accused of having a meager appetite, I think that scaling back just a bit might help to avoid a post-dinner nap. Next time, I'll trade out the banana for blueberries, hold the chocolate chips, and use whole wheat flour. I'm already looking forward to it.
Pancake for One
adapted from Joy the Baker
1/3 c. all-purpose flour
3 tbsp. dried oats (quick-cooking or regular)
1 tsp. brown sugar
1/2 tsp. baking powder
1/4 tsp. baking soda
pinch of salt
1 tbsp. plus 2 tsp. vegetable oil
1/4 c. plus 2 tbsp. buttermilk
dash of vanilla extract
small handful semi-sweet chocolate chips
1 banana, sliced thinly
chopped walnuts (or pecans, or sliced almonds...)
1. In a small bowl, whisk together flour, sugar, baking powder and soda, and salt. In another, combine oil, buttermilk, and vanilla.
2. Add the wet ingredients to the dry and stir to combine. Fold in the chocolate chips and half the banana slices (or whatever fun add-ins you decide on).
3. Heat a small frying pan. Pour in the pancake batter; even out with the back of a spoon. Cook over medium heat until bubbles form and pop on the surface. Flip. Cook until golden brown.
4. Top with the rest of the banana slices, hum the chorus to "Single Ladies," and enjoy.
Subscribe to:
Posts (Atom)